有时候,在分享链接时,链接过长可能会影响分享效率,生成短网址也可方便记忆,例如,本文章网址是:https://lianghg.com/2018/10/15/short-url/,可生成短网址为:http://these.ml/url,直接访问短网址即可到达本文章了。
网上虽然有很多网站都可以生成短网址,但毕竟都是依靠别人的短域名服务器,如果别人的服务器有变动,你生成的短网址很可能就不能再使用了。
本文章分享如何使用自己的短域名来搭建一个自用的短域名服务器。
首先要准备一台自用的服务器,一个尽量短的域名,然后就可以开始进行搭建了。
本文章以CentOS 7 64为例,使用LNMP环境,所以建议服务器内存为512M或以上。之前文章分享了如何部署LNMP,现在不作介绍,以本人的短域名 these.ml 为例,搭建短域名服务器。
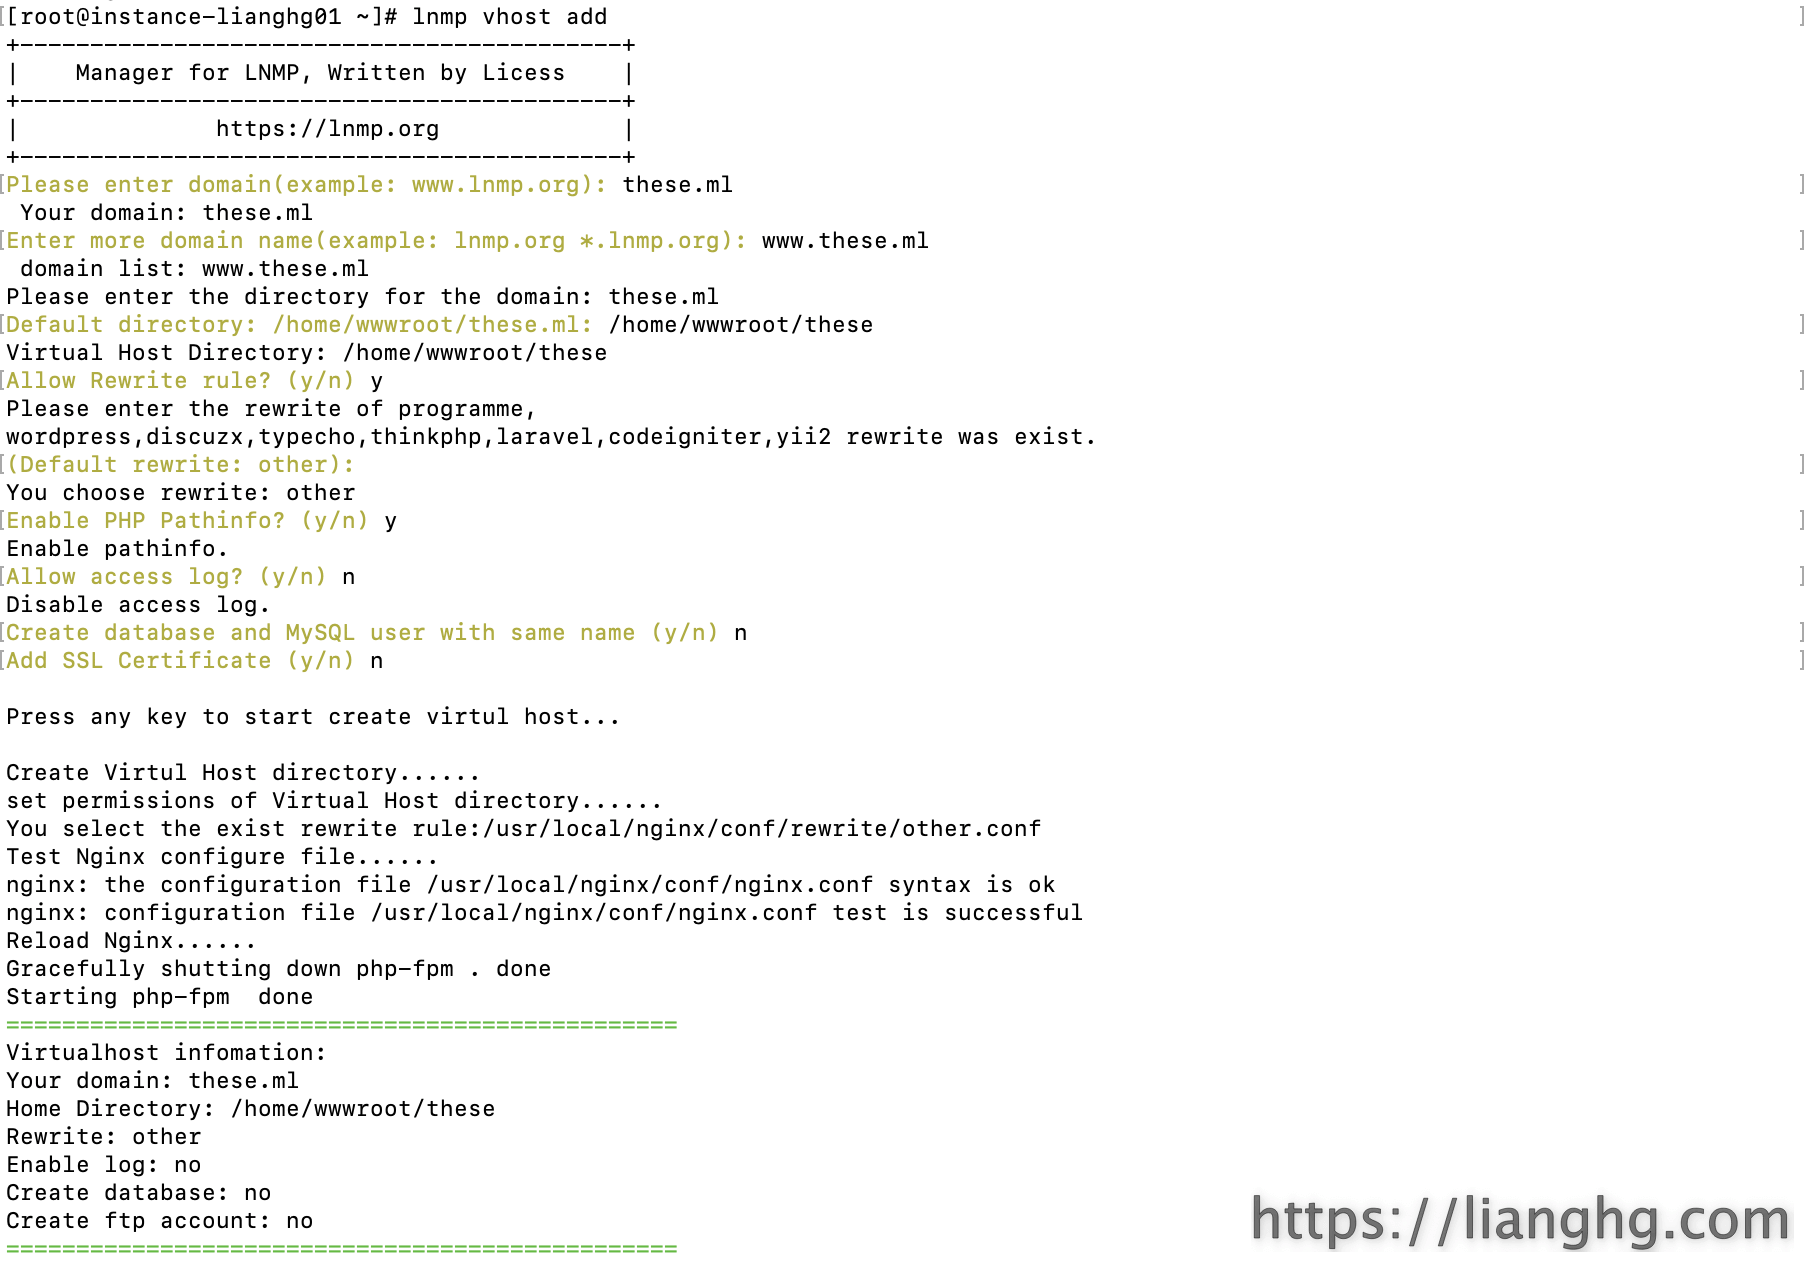
第一步,配置站点。SSH链接服务器后,执行:lnmp vhost add命令,添加新站点:these.ml ,注意,此步骤只添加新站点即可,不用创建新数据库,因为LNMP创建的数据库参数可能会导致后续安装报错。如图:

第二步,新建数据库。LNMP部署的时候,带有phpMyAdmin,浏览器输入:http://你服务器IP/phpmyadmin 即可访问,输入数据库用户名和密码登录。
登录数据库后,点击左侧 新建 按钮,新建数据库名为 yourls ,排序规则为 utf8_general_ci ,如下图所示:

第三步,安装yourls。SSH链接服务器后执行以下命令,网站目录替换为你自己的目录:
- cd /home/wwwroot/these
- git clone https://github.com/YOURLS/YOURLS.git && chown -R www:www YOURLS && cd YOURLS && mv * ../ && cd ..
- cd user
- mv config-sample.php config.php
- vim config.php
修改以下红色字体信息:
/** MySQL database username */
define( 'YOURLS_DB_USER', '你的数据库用户名' );

/** MySQL database password */
define( 'YOURLS_DB_PASS', '你的数据库密码' );

/** The name of the database for YOURLS */
define( 'YOURLS_DB_NAME', 'yourls' );

/** YOURLS installation URL -- all lowercase, no trailing slash at the end.
 ** If you define it to "http://sho.rt", don't use "http://www.sho.rt" in your browser (and vice-versa) */
define( 'YOURLS_SITE', 'http://these.ml' );

/** A random secret hash used to encrypt cookies. You don't have to remember it, make it long and complicated. Hint: copy from http://yourls.org/cookie **/
define( 'YOURLS_COOKIEKEY', '你的随机字符' );

/** Username(s) and password(s) allowed to access the site. Passwords either in plain text or as encrypted hashes
 ** YOURLS will auto encrypt plain text passwords in this file
 ** Read http://yourls.org/userpassword for more information */
$yourls_user_passwords = array(
        '你的后台登录用户名' => '你的后台登录密码',
接着配置站点的nginx文件:
- cd /usr/local/nginx/conf/vhost/
- vim these.ml.conf
添加以下信息:
location ~ / {
try_files $uri $uri/ /yourls-loader.php;
location ~ [^/].php(/|$)
{
# comment try_files $uri =404; to enable pathinfo
try_files $uri =404;
fastcgi_pass unix:/tmp/php-cgi.sock;
fastcgi_index index.php;
include fastcgi.conf;
}
}
检查一下nginx配置,没有问题的话,重启nginx:
- nginx -t
- service nginx restart
Apache配置一下.htaccess:
# BEGIN YOURLS
<IfModule mod_rewrite.c>
RewriteEngine On
RewriteBase /
RewriteCond %{REQUEST_FILENAME} !-f
RewriteCond %{REQUEST_FILENAME} !-d
RewriteRule ^.*$ /yourls-loader.php [L]
</IfModule>
# END YOURLS
<IfModule mod_rewrite.c>
RewriteCond %{HTTP_HOST} ^www\.(.*) [NC]
RewriteRule ^(.*)$ https://%1/$1 [R=301,NC,L]
</IfModule>
至此,yourls配置结束。
第四步,登录yourls管理后台。浏览器输入:http://these.ml/admin ,点击页面的 Install YOURLS ,即可用后台用户名和密码登录了。